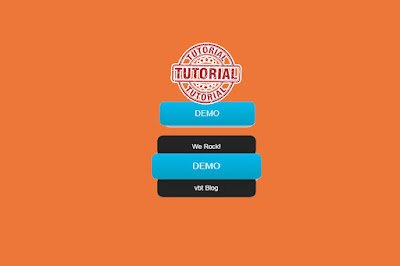
Adding the CSS in the Template
Let us begin with the tutorial, simply follow the steps below:
Step #1: Log in to your Blogger Account and Go to your Blogger Dashboard.
Step #2: Click Theme --> Edit HTML.
Step #3: Find </body> by Pressing CTRL + F (Windows) or CMD + F (MAC)
Step #4: Now paste the below code above/before </body> tag.
<style> .abt-button { margin: 50px auto; width: 200px; } /* Get this button at vblogger-templates.blogspot.com */ .abt-button a { background: -moz-linear-gradient(center top , #00B7EA 0%, #009EC3 100%) repeat scroll 0 0 transparent; color: white; display: block; font: 17px/50px Helvetica,Verdana,sans-serif; height: 50px; text-align: center; text-decoration: none; text-transform: uppercase; width: 200px; position: relative; z-index: 2; /*TYPE*/ color: white; font: 17px/50px Helvetica, Verdana, sans-serif; text-decoration: none; text-align: center; text-transform: uppercase; /*GRADIENT*/ background: #00b7ea; /* Old browsers */ background: -moz-linear-gradient(top, #00b7ea 0%, #009ec3 100%); /* FF3.6+ */ background: -webkit-gradient(linear, left top, left bottom, color-stop(0%,#00b7ea), color-stop(100%,#009ec3)); /* Chrome,Safari4+ */ background: -webkit-linear-gradient(top, #00b7ea 0%,#009ec3 100%); /* Chrome10+,Safari5.1+ */ background: -o-linear-gradient(top, #00b7ea 0%,#009ec3 100%); /* Opera 11.10+ */ background: -ms-linear-gradient(top, #00b7ea 0%,#009ec3 100%); /* IE10+ */ background: linear-gradient(top, #00b7ea 0%,#009ec3 100%); /* W3C */ filter: progid:DXImageTransform.Microsoft.gradient( startColorstr='#00b7ea', endColorstr='#009ec3',GradientType=0 ); /* IE6-9 */ } .abt-button a, .abt-button p { -webkit-border-radius: 10px; -moz-border-radius: 10px; border-radius: 10px; -webkit-box-shadow: 2px 2px 8px rgba(0,0,0,0.2); -moz-box-shadow: 2px 2px 8px rgba(0,0,0,0.2); box-shadow: 2px 2px 8px rgba(0,0,0,0.2); } .abt-button p { background: #222222; color: #FFFFFF; display: block; font: 12px/45px Helvetica,Verdana,sans-serif; height: 40px; margin: -40px 0 0 10px; position: absolute; text-align: center; transition: margin 0.5s ease 0s; width: 180px; z-index: 1; /*TRANSITION*/ -webkit-transition: margin 0.5s ease; -moz-transition: margin 0.5s ease; -o-transition: margin 0.5s ease; -ms-transition: margin 0.5s ease; transition: margin 0.5s ease; } .abt-button:hover .up { margin: -5px 0 0 10px !important; } .abt-button:hover .down { line-height: 35px !important; margin: -85px 0 0 10px !important; } .abt-button a:active { background: #00b7ea; /* Old browsers */ background: -moz-linear-gradient(top, #00b7ea 36%, #009ec3 100%); /* FF3.6+ */ background: -webkit-gradient(linear, left top, left bottom, color-stop(36%,#00b7ea), color-stop(100%,#009ec3)); /* Chrome,Safari4+ */ background: -webkit-linear-gradient(top, #00b7ea 36%,#009ec3 100%); /* Chrome10+,Safari5.1+ */ background: -o-linear-gradient(top, #00b7ea 36%,#009ec3 100%); /* Opera 11.10+ */ background: -ms-linear-gradient(top, #00b7ea 36%,#009ec3 100%); /* IE10+ */ background: linear-gradient(top, #00b7ea 36%,#009ec3 100%); /* W3C */ filter: progid:DXImageTransform.Microsoft.gradient( startColorstr='#00b7ea', endColorstr='#009ec3',GradientType=0 ); /* IE6-9 */ } .abt-button:active .up { margin: -20px 0 0 10px !important; } .abt-button:active .down { margin: -70px 0 0 10px !important; } </style>
Step #5: Click Save Template and your done.
Adding the Button
In adding the button in your post simply switch the post editor to HTML from Compose and add the below HTML.
div class="abt-button"> <a href="#">Download</a> <p class="up">click to begin</p> <p class="down">5MB size</p> </div>
Note: Simply change the words with red color of your own.
That's all for this tutorial. Feel free to comment below if you have any questions or suggestions. If you like this post kindly share and even share us a beer! Thanks Happy Blogging!


No comments:
Post a Comment